This was a day of practical instruction in a skill that is vital to any form of cross-country tramping
- using a map and compass. Our instructors were Peter and Val Osborne, who had given us a very enjoyable
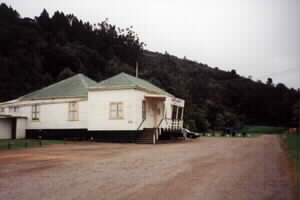
and informative day in the Karamatura Valley near Huia in July last year. This time we had the use of
Camp Sladdin, a scout camp at the northern end of the Clevedon township and at the start of the Clevedon
Scenic Reserve.
And we were glad we had the use of the scout camp - the weather was wet and drizzly,
and we were able to enjoy our lessons inside the camp’s dining hall.
“School” began about 9am
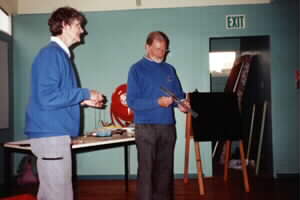
when the ten “students” paid their fees to cover hire of the camp and cost of materials, then Peter showed
us a selection of compasses, including some very old ones. He told us that the working part of a compass
is a magnetised needle that swings on a pivot so that the end coloured red points towards magnetic north,
with the rest of the compass (these days a transparent plastic base with scales ruled on it) used in
conjunction with maps, etc. A steel bulldog clip was passed around to demonstrate how anything that is
magnetic (steel, iron, loudspeakers, magnets, power lines, etc) in the immediate vicinity would deflect
the compass needle and ruin any readings.
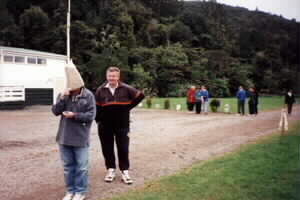
Peter then showed us how to take a bearing with a compass.
The compass must be held flat in the palm of the hand at waist level directly in front of the tummy,
with the arrow on the base pointing straight ahead. The dial is then turned around so the needle is aligned
with the north position, and the arrow then shows the bearing in degrees on the dial.
|
|
 |
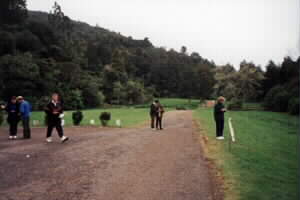
We went outside to walk the triangle, ie. 10 paces at a given bearing (up to 50ş), then 10 paces
at the given bearing plus 120ş and finally 10 paces at the given bearing plus 240ş. This if done correctly
would finish back at the starting point - we were given numbered blue plastic milk bottle tops to put
on the ground to mark this.
Our instructors got us to walk between two markers exactly 50 metres
apart on flat ground so that we could count how many footsteps at normal walking pace it would take to
cover the distance. Knowing the number of paces to cover this distance, and therefore the number of paces
to cover set shorter distances such as 5 metres, is very useful in trying to measure or estimate distance
walked especially in such situations as finding a difficult-to-see track junction.
|
|
 |
We went back inside for morning tea before Peter told us about using a back bearing to ensure we
keep on the right course. When one follows a compass bearing, eg. 150m at 160ş, quite often he/she would
finish slightly off-course. To check this, one would then look back to the starting point, line up the
compass and move till that point is at 180ş plus the original bearing, ie. 340ş in this example. Doing
this would ensure being back on course.
We then went back outside and divided into pairs for
our blindfold exercise. One person in each pair would set a bearing, then be blindfolded and walk about
twenty metres, with the other person seeing whether the blindfold walk was straight on course or wander
off to one side. The two persons in each pair would then swap roles. Such a situation in reality would
be quite rare, such as a pitch dark night with no lights visible.
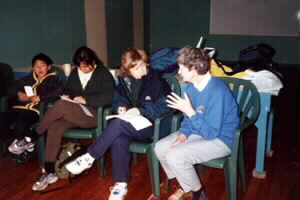
Amongst the blindfolds used
were the scarves that Peter had used in his younger days back in England as a boy scout and later as
a scoutmaster. Both Peter and Val wore identical blue sweatshirts from an English girl guide group that
carried a logo consisting of the outline of the girl guide trefoil and a pair of tramping boots.
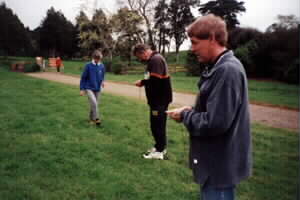
Another situation that is more common is fog or mist, where one can see the ground but nothing ahead.
We repeated this exercise this time with a large paper bag over the head to prevent being able to see
ahead but be able to see the ground. The person with the bag over the head would set the bearing, then
be able to keep looking at the compass to ensure keeping in the right direction.
|
|
|
|
Peter and Val had set up a series of basic orienteering courses in the lawn outside the dining hall
- these consisted of about eight sets of bearings and distances, with checkpoints marked with letters
of the alphabet. We stayed in our pairs for these, then we had a go at a larger course that took us around
most of the camp property. Afterwards some of us had a go at setting up a course for the others to try
out.
|
|
|
|
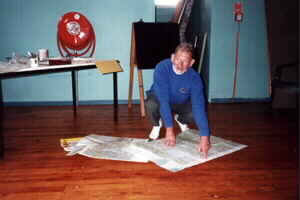
We went back inside to start on map work. Peter showed a variety of maps, ranging from street maps
and road maps to tramping maps of national parks and topographical maps. He explained the New Zealand
grid system that was established in 1973 when metric measures were introduced and the new 1:50000 maps
began to replace the former 1:63360 (1 inch = 1 mile) maps. The grid consists of eastings (vertical lines)
and northings (horizontal lines); grid references are always read with eastings then the northings -
two ways to remember this are the mnemonic IN the door and UP the steps, and E comes before N in the
alphabet. A full grid reading contains 7 digits for each of eastings and northings, but only three digits
(3rd, 4th, 5th) are used, preceded by the map sheet number, eg. U20/643758 with 643 being the eastings
and 758 the northings. Grid lines for the third digit are 10km apart, the fourth digit 1km apart and
the fifth digit 100m apart.
|
|
 |
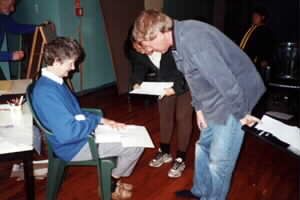
Peter handed out sheets marked with a grid for an exercise in grid references. We had to work out
the grid references for some objects marked on the sheets, and also mark in the positions of given grid
references. The 5th digit of a grid reference is determined by estimating the distance between the two
grid lines representing the 4th digit. An easy way to work this out is to make a scale of tenths on two
sides of a small square of paper; alternatively most compasses have a scale ruler specially made for
this purpose.
We were then told about the contour lines on a map to show where hills and gullies
are, and how steep they are - the closer the lines the steeper the terrain is.
As a way to try
and memorise what map symbols mean, we divided into two teams for a memory game. Each team had a piece
of paper divided into nine (3x3) squares, and Val sat up front with a simple map divided up into the
same sequence of squares, which she showed one square at a time. Members of the team took it in turns
to look at one of the squares on Val’s map, then reproduce the details (streams, roads, tracks, lakes,
etc) from memory on their piece of paper. The result - a map with nine disjointed squares!
|
|
 |
After our lunch break Peter explained there are actually three “norths” in map reading - magnetic
north which in New Zealand is almost 20ş east; true north being the axis on which the earth rotates;
and grid north, a hypothetical north as the basis for the parallel north-south grid lines.
He
then explained how to use a map in conjunction with a compass. The compass is laid on the map with the
arrow pointing in the direction of travel. The dial of the compass is then rotated till the lines on
the dial are parallel with the grid lines. The resulting reading on the compass arrow is the grid bearing;
to obtain the magnetic bearing the difference between true and magnetic north (almost 20ş) is taken
off.
We were then told how to set a map. To do this, the lines on the compass are set to the grid
lines on the map, and the map and compass are rotated until the compass needle is pointing to the magnetic
north position on the dial. Once this is done features such as hills, rivers, landmarks, etc will suddenly
jump into perspective and it will be easier to know where one is and which way to travel.
|
|
 |
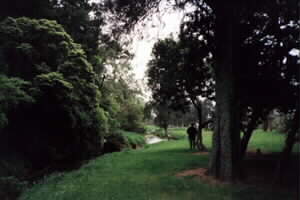
Our instruction finished before 2pm. It had been planned to have an optional walk up to the trig
at the top of Clevedon Scenic Reserve, but rain had now set in and we all just headed home having enjoyed
and benefitted from top quality instruction from our Club president and his wife.
COST: $4-80
travel; $2 scout camp hire; 50c materials.
|
|
|
|
|